Advertisement
Download Canon PIXMA iP110 Photo Inkjet Printers Driver for Windows 11-10-10×64-8.1-8.1×64-8-8×64-7-7×64
iP110 series XPS Printer Driver, iP110 series Printer Driver (Windows)

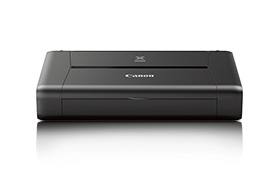
The PIXMA iP110 is a wireless1 compact mobile printer that offers real convenience and superior image quality. Its compact and lightweight design makes it ideal for the business professional on the go. And with a maximum color dpi of 9600 x 24002 with 1pl technology, it delivers gorgeous photos and crisp, business documents up to 8.5″ x 11″.
Canon PIXMA iP110 Printer Driver for Windows
Compatibility Systems: Windows 11, Windows 10 (32bit), 10 (64bit), Windows 8.1 (32bit), 8.1 (64bit), Windows 8 (32bit), 8 (64bit), Windows 7 (32bit), 7 (64bit)
| Driver Name | Version | Release date | File Size | Download Link |
| iP110 series XPS Printer Driver | 5.81 | 15 Oct, 2021 | 18.0 MB | Download |
| iP110 series Printer Driver | 1.01 | Oct 15, 2021 | 15.01 MB | Download |
iP110 series XPS Printer Driver: This is an advanced printer driver. XPS printer drivers supports 16-bits per color (bpc) printing, which enables more smooth gradation printing than the current drivers (8-bpc printing).
Download / Installation Procedures
- Download the file. For the location where the file is saved, check the computer settings.
- Double-click the downloaded EXE file to decompress it, then installation will start automatically.
iP110 series Printer Driver: This is a printer driver that will provide full functionality for your selected model. For an enhanced user experience we also recommend installing My Image Garden software. A version of this standard driver will have been included on the CD provided with your original product.
Download / Installation Procedures
- Download the file. For the location where the file is saved, check the computer settings.
- Double-click the downloaded EXE file to decompress it, then installation will start automatically.
Uninstall Procedures
If needed, you can uninstall this program using the Control Panel.
*The steps below are for Windows 7. This procedure may be different for other OSes.
- On the Start menu, click Control Panel, and then, under Programs click Uninstall a Program
- A page will open with a list of installed programs. Double click on the program that you want to uninstall.
- Click “Yes” then “OK”, this will complete the uninstallation process.
Advertisement