Advertisement
Canon MAXIFY GX1060 Printer Driver Download for Windows 11-10-8.1-7 (32bit-64bit)
GX2000 series MP Driver for Microsoft Windows
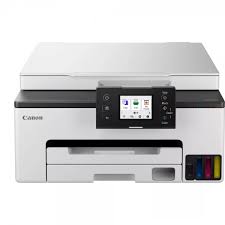
The MAXIFY GX1010 MegaTank All-in-One inkjet printer is designed for your small office. It has a 2.7″ color touch LCD screen that can be tilted so you can manage your work. The printer is 15% smaller than previous MAXIFY printers, but it is functionally very good. It is preferred because it can print double-sided. This device can be placed next to the wall. The screen of the GX1010 printer is on the front.
It’s stylish and convenient, and you can print business documents with a status light and intuitive user interface. Get high print durability of 15 ipm black and 10 ipm color, and scan directly to network folders and email for colleagues to access.
Thanks to its 250-sheet paper capacity, you can achieve automatic double-sided printing without the need to constantly reload paper.
As a result, you can easily print using the network with this device.
This printer is high volume and economical.
Canon MAXIFY GX1060 Driver Download for Windows
Compatibility Systems: Windows 11, Windows 10 (32bit), 10 (64bit), Windows 8.1 (32bit), 8.1 (64bit), Windows 7 (32bit), 7 (64bit)
| Driver Name | Version | Released | File Size | Download Link |
| GX1000 series MP Driver | 1.03 | Dec 20, 2023 | 84.5 MB | Download |
GX2000 series MP Driver: This driver will provide full printing and scanning functionality for your product. The following applications are included in this package. Printer Driver Scanner Driver WIA Driver Fax Driver IJ Scan Utility IJ Network Scanner Selector EX2
Download / Installation Procedures
- Download the file. For the location where the file is saved, check the computer settings.
- Double-click the downloaded EXE file to decompress it, then installation will start automatically.
A message may be displayed during the installation depending on the OS you are using, but continue the installation.


